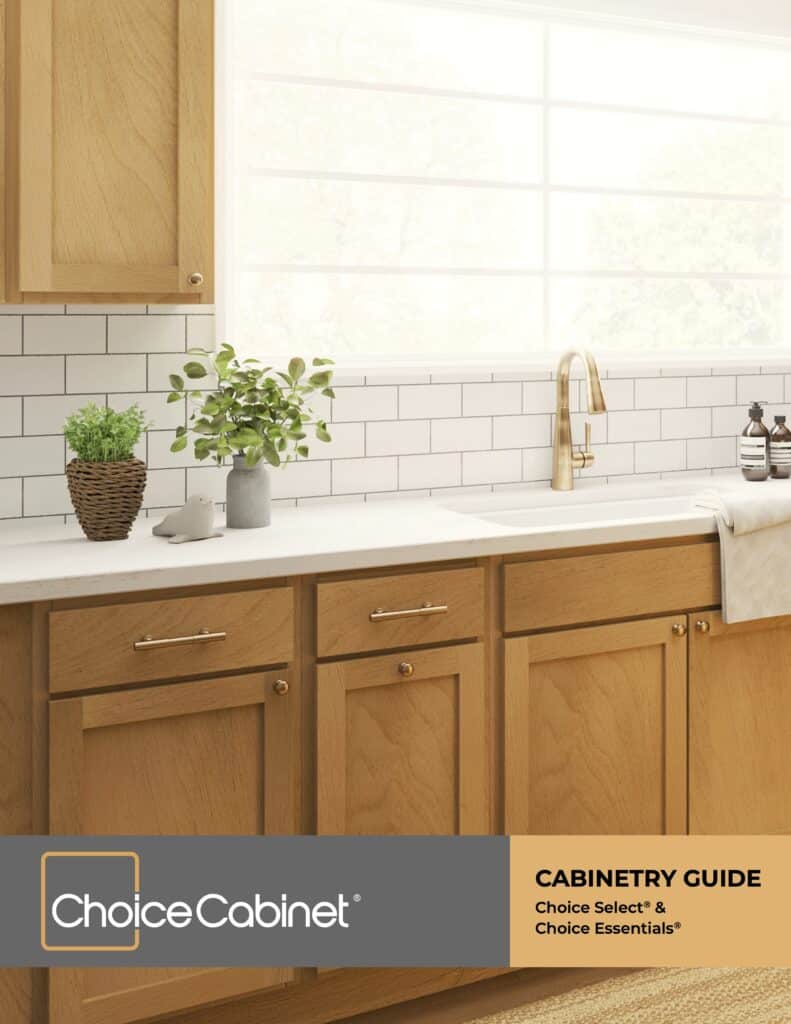
Expert Tips for Painting Kitchen Cabinets Like A Pro
 Want a kitchen makeover, but got no time or budget for a complicated remodel? Painting kitchen cabinets can refresh even the most outdated space. However, the prospect of painting one of the most prominent parts of your kitchen can be intimidating.
First, it’s not as hard as you think. Second, it’s more affordable than replacing your cabinets outright. Finally, it’s the perfect DIY project provided you’ve prepared as much as possible.
Now, we’re big fans of home improvement projects here at Choice Cabinet. And we absolutely love the way cabinets can turn any kitchen from average to stunning! To set you up for success, we’re outlined some basic advice to jumpstart your cabinet painting project.
What’s the best cabinet material to paint?
If you have solid wood cabinets, then you’re already one step ahead. Wood, wood-laminate, and metal are the best materials for a painting job. They easily accept a top coat and don’t require special techniques or types of paint.
On the other hand, you may find plastic laminate surfaces more challenging to paint. We recommend checking with your local paint dealer to ensure that the paint you want to use will bond to the plastic laminate surface.
Essential Steps to Painting Kitchen Cabinets
 First, you’ll want to gather your equipment. The most common things you’ll need are:
- Fine-grit sandpaper
- Sanding block
- Painter’s or masking tape
- Primer sealer
- Tack cloth
- Steel wool
- Shop vacuum
- Buckets
- Drill/Driver Bits
- Wood filler
- Painter’s trays and liner
- Paint foam covers and roller frame
- Primer
- Foam roller
- Bristle brush
- Your paints of choice
- New doors and hinges if a replacement is necessary
Those are the basic tools and materials you’ll need for painting kitchen cabinets. Not sure if you’re making the correct choices? Your local paint store can give you valuable advice if you’re going DIY. They can help you compare swatches, choose paint and primer, and purchase the right tools for the project, so don’t hesitate to ask them a few questions.
Once your materials are ready, familiarize yourself with the painting process:
Step 1: Create a flat painting surface.
Remove all cabinet doors, drawers, and hardware from your cabinets so you have a flat painting surface. Clear your work area and make sure there’s enough space for both the painting and drying phases of the project.
Step 2: Prepare your kitchen cabinets for painting.
Wipe down the cabinets, drawers, and doors with a damp sponge and gentle grease remover. Dry everything throughout.
When everything is clean and dry, sand cabinets so the primer has some grit to stick to. Use a slightly damp cloth to wipe away dust. Let dry completely.
Step 3: Protect your surroundings.
Painting your cabinets is a messy affair, so you’ll want to protect the rest of the kitchen against splatters. Tape a protector like a drop cloth over the work area and countertops before you begin.
Step 4: Prime the cabinets before painting.
Primers bind the paint to the cabinet surface, and they also seal it so that nothing bleeds through. It’s absolutely essential to apply a primer coat before the paint.
Different cabinet surfaces may call for different types of primers. For instance, lacquer-based primers may not work well on laminate cabinets because the paint won’t adhere to the surface. Be sure to always double-check the primer-paint combination you’re using.
After applying the primer, let it dry for a minimum of 24 hours before the next step.
Pro-Tip: Use a tinted primer as the base if you’re painting your cabinet doors and drawers a darker color.
Step 5: Sand the cabinet surfaces again.
For a really nice finish, sand the cabinet once the primer is completely dry. Use a sanding block or grit paper. Concentrate on areas that have pools or drips, such as anywhere where two flat areas meet and inside corners.
As you sand, ensure you do so as evenly as possible. This way, your paint goes on smoothly. After sanding, use a damp cloth to wipe away dust and let it dry.
Step 6: Start Painting!
Using a brush, apply your first coat of paint. If painting larger areas such as cabinet doors, use a microfiber or form paint roller instead of a brush so you can go faster.
Always let the first coat dry before adding another one.
Step 7: Sand the painted surface.
Yes, you will need to sand the cabinet again. This is to ensure that every inch of the cabinet is even and smooth. Go gently as not to damage the paint layers.
Step 8: Repaint the cabinet.
For complete coverage, paint on another coat on the cabinet surface. This allows the finish to cure evenly and gives you complete coverage.
Step 9: Let everything dry.
For the most durable finish, let the paint dry as much as possible. This also prevents the paint from sticking during reinstallation.
Dry your painted cabinets for at least 24 hours in a well-ventilated area. For best results, give your freshly-painted cabinets two to three days to dry.
Other Practical Tips for Painting Kitchen Cabinets
 Ready to paint your kitchen cabinets? Ensure the perfect finish by keeping the following tips in mind:
- Reserve at least a full week for the project so you can prepare accordingly.
- Always clean the cabinet with a grease remover before starting or the paint may fail to stick.
- Remove doors and drawers to paint them. Don’t cut corners here—painting the cabinet with the doors, drawers, and hinges on can cause them to chip quickly.
- Label where all the cabinet parts will go to avoid confusion.
- Never skip sanding.
- Don’t rush to put the cabinets back. Wait for the paint to cure before reinstallation.
Complete Your Kitchen Remodel with Choice Cabinet
At Choice Cabinet, you’ll find a wide array of products to help you achieve your dream kitchen. Whether you need Decorative Hardware for your newly-painted cabinets, Storage and Accessories, or all-new Kitchen Cabinets, we got your covered. Contact Us today for design advice, to explore our products, or to find a dealer near you!